
The Wahoo KickR is an exceptional turbo trainer, and arguably one of the best available on the market today. But at a recommended retail price of £950, it is not cheap, and probably what puts a lot of potential buyers off from the initial upfront investment. This included me a few months ago when I was buying my first turbo trainer, and opted for the CycleOps Jet Fluid Pro. Now, less than 2 months later, I have jumped onto the KickR scene, reasons for which I will explain shortly. But before that, let’s take a quick look at the specs of the KickR and what you get in the box.
SPECIFICATIONS
I have attached the specs of the KickR (along with a comparison with the newly released KickR SNAP, taken from the Wahoo website (link: http://uk.wahoofitness.com/devices/kickr.html).

FIRST IMPRESSIONS / SET-UP
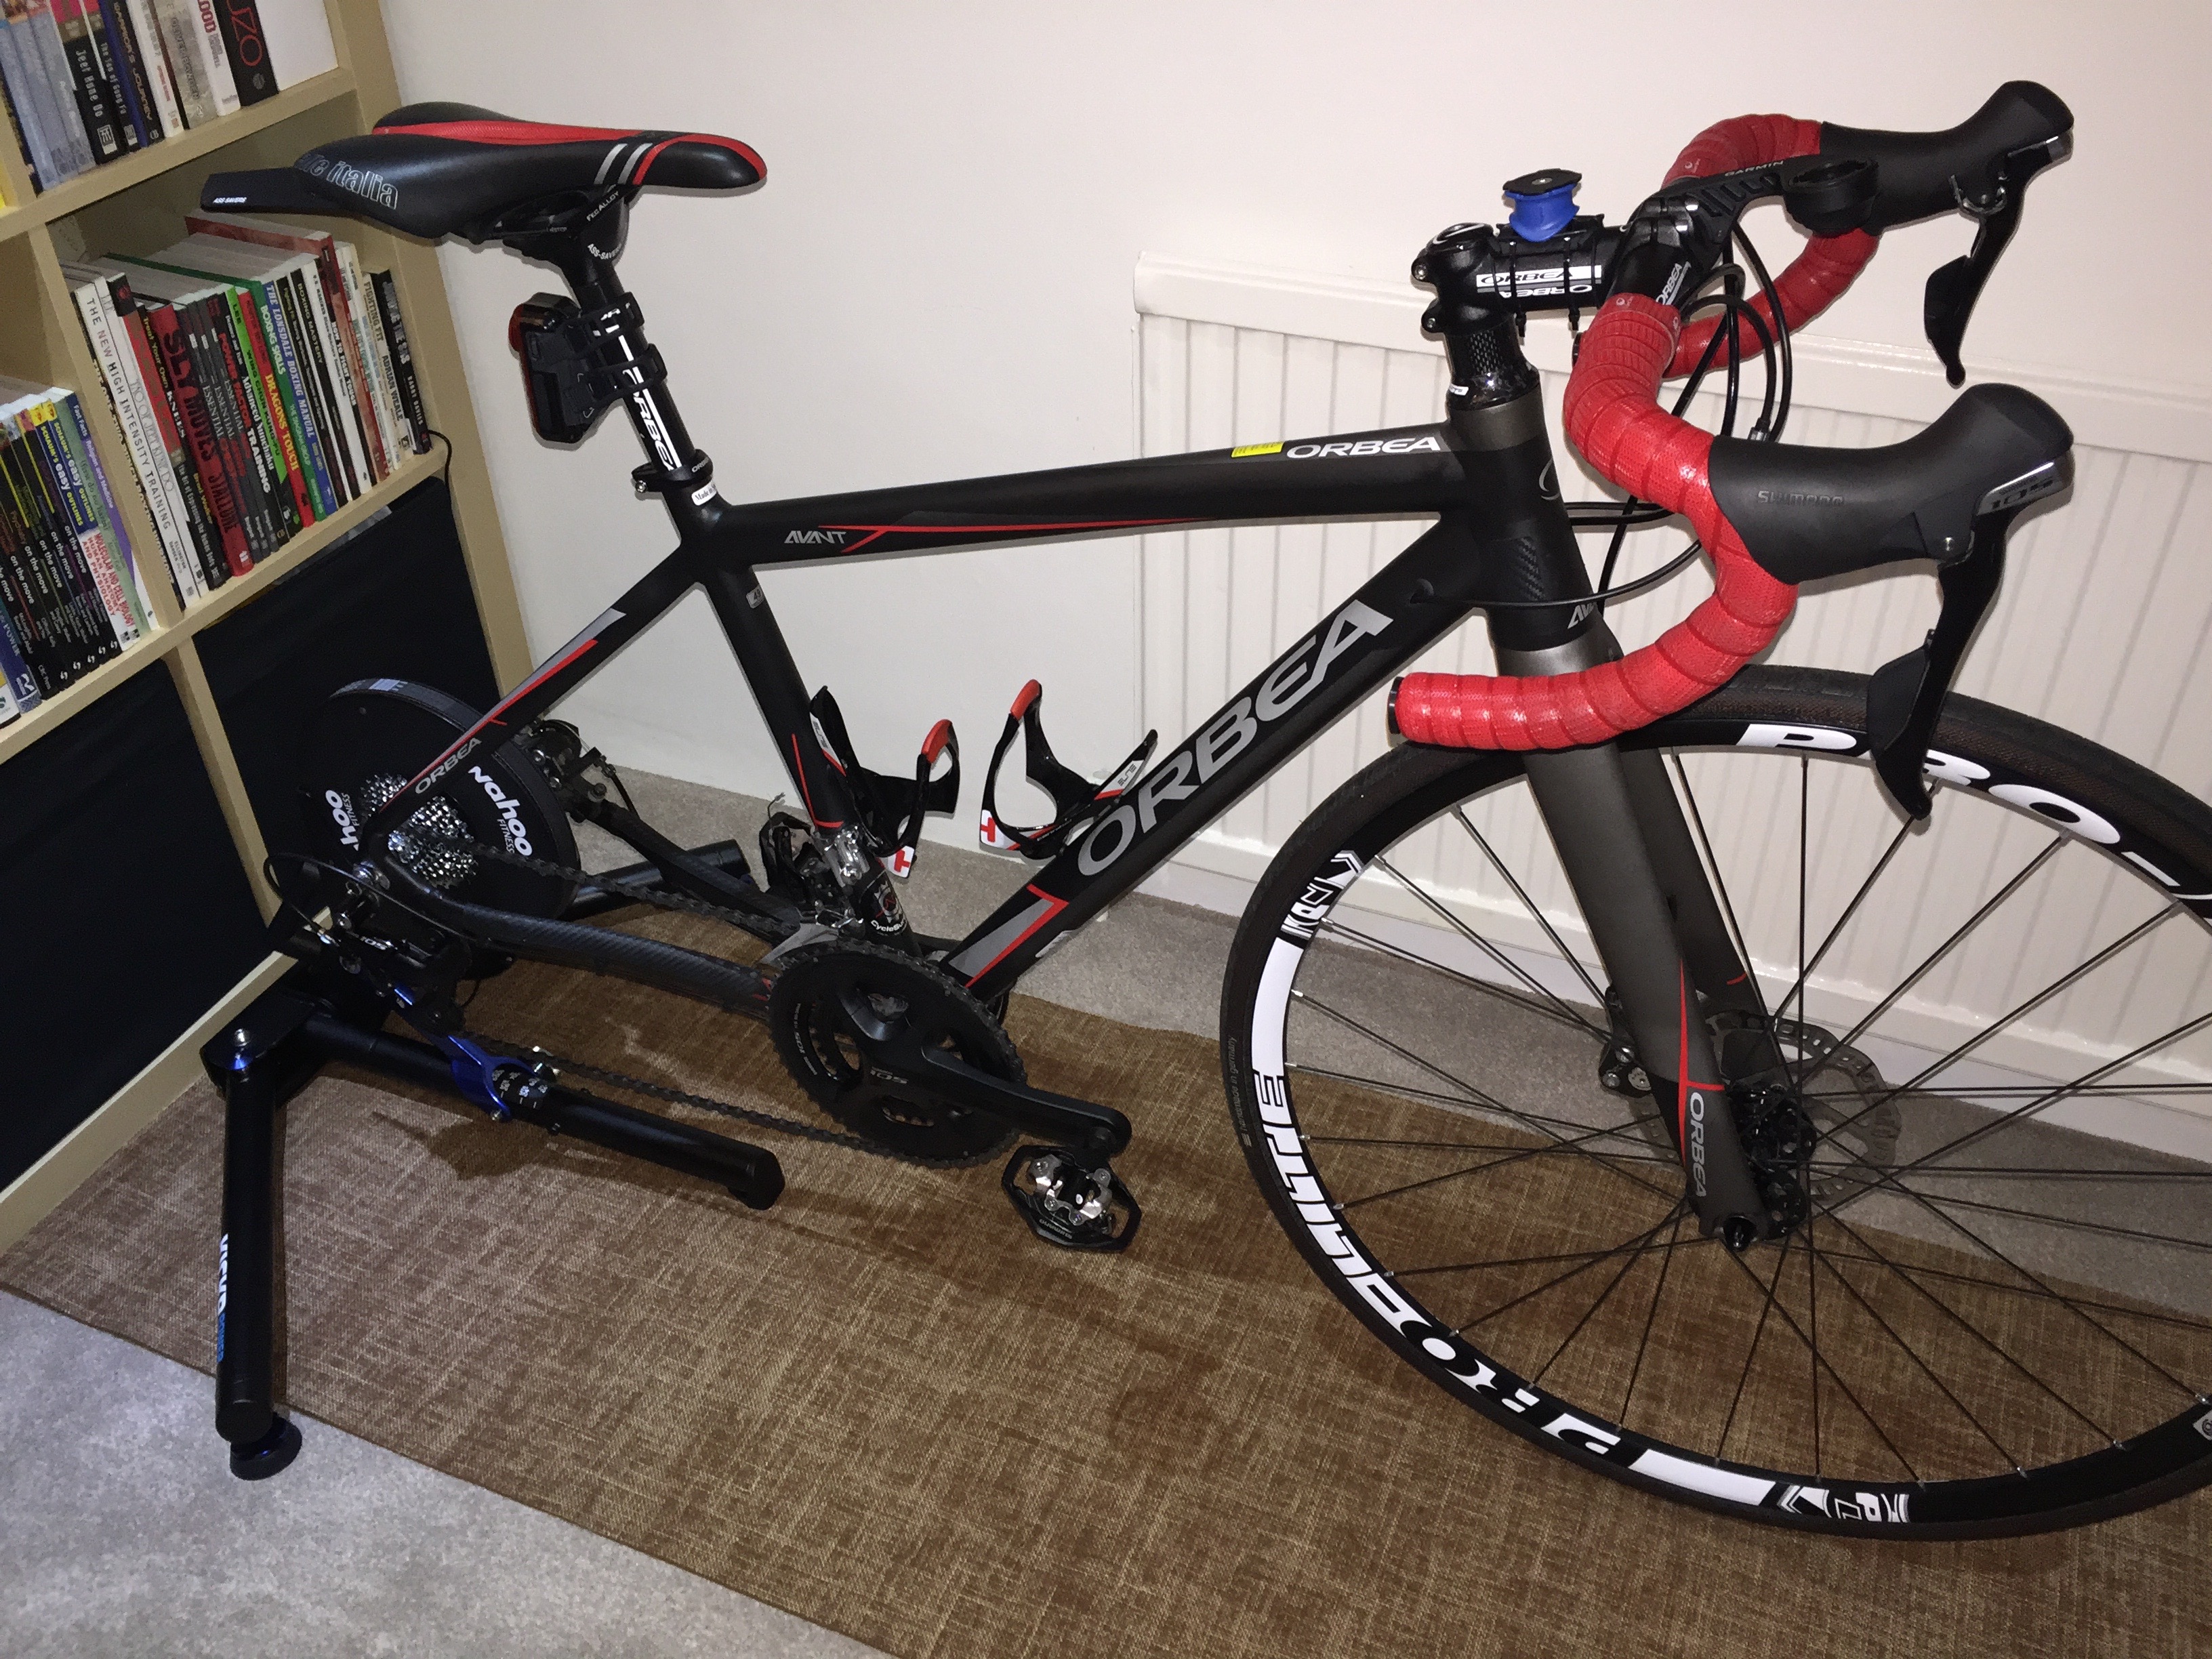
First impressions are very mixed, and I will explain why. The KickR is exceptionally built and very sturdy, weighing 21kg. The weight was what struck me when I took delivery. Boxed weight was 28 kg and my upper body strength must not be what is used to as I struggled to lift it! Immediately after removing the KickR from the box, you know that you have just purchased a high quality product. Here is what is included:
-Wahoo KickR
-Power supply
-Cadence sensor
-11-speed Sram/Shimano compatible cassette (11-25)
-Disc brake pad spacer
-Instructions


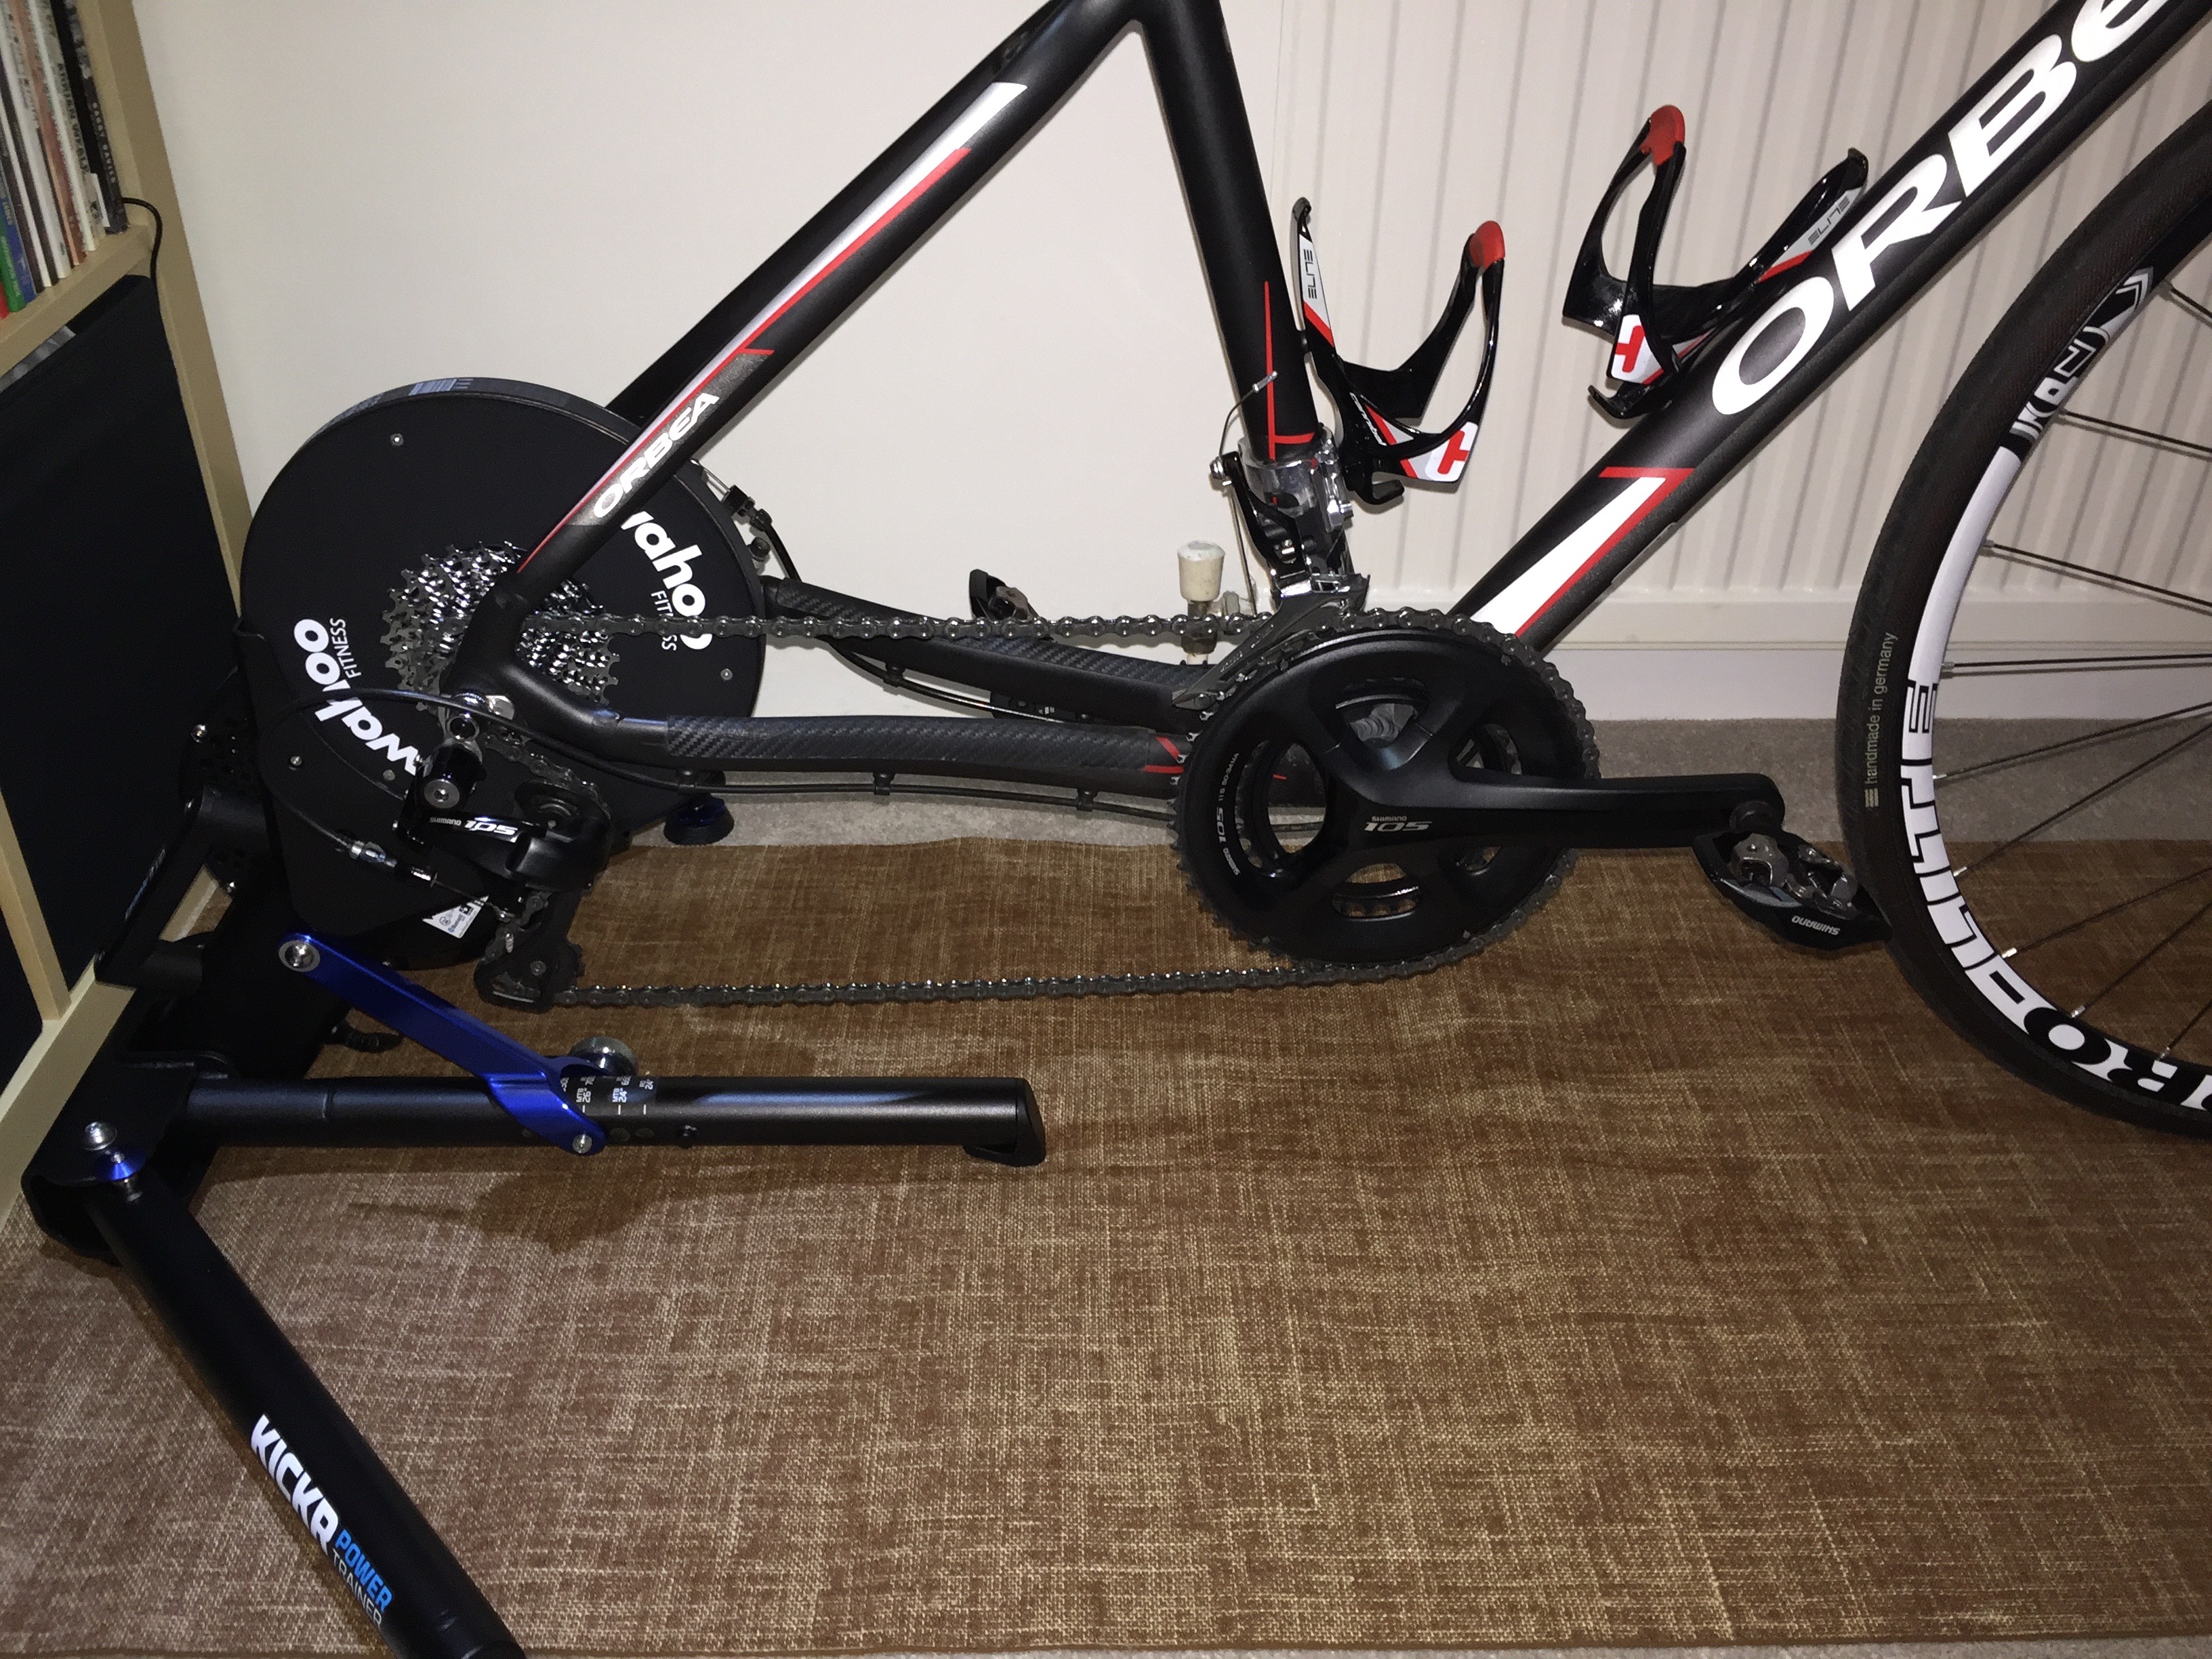
Unlike a traditional turbo trainer, the KickR uses a direct mount, meaning that you simply remove the rear wheel of your bike and attach it to the KickR. BOOM! No hassles with attaching a spare rear wheel, changing tyres, etc. Note, that some derailleur adjustment is required. This also gives for a more realistic bike feel, too. I briefly considered getting the KickR SNAP, which is Wahoo’s newest smart turbo, but features a wheel-on design, more like a traditional turbo. However, I did not want to have any further purchase related regrets, and wanted the best possible experience/road feel. As a result, I simply decided to opt for a ‘top-of-the-range’ trainer and fork out for the standard KickR.
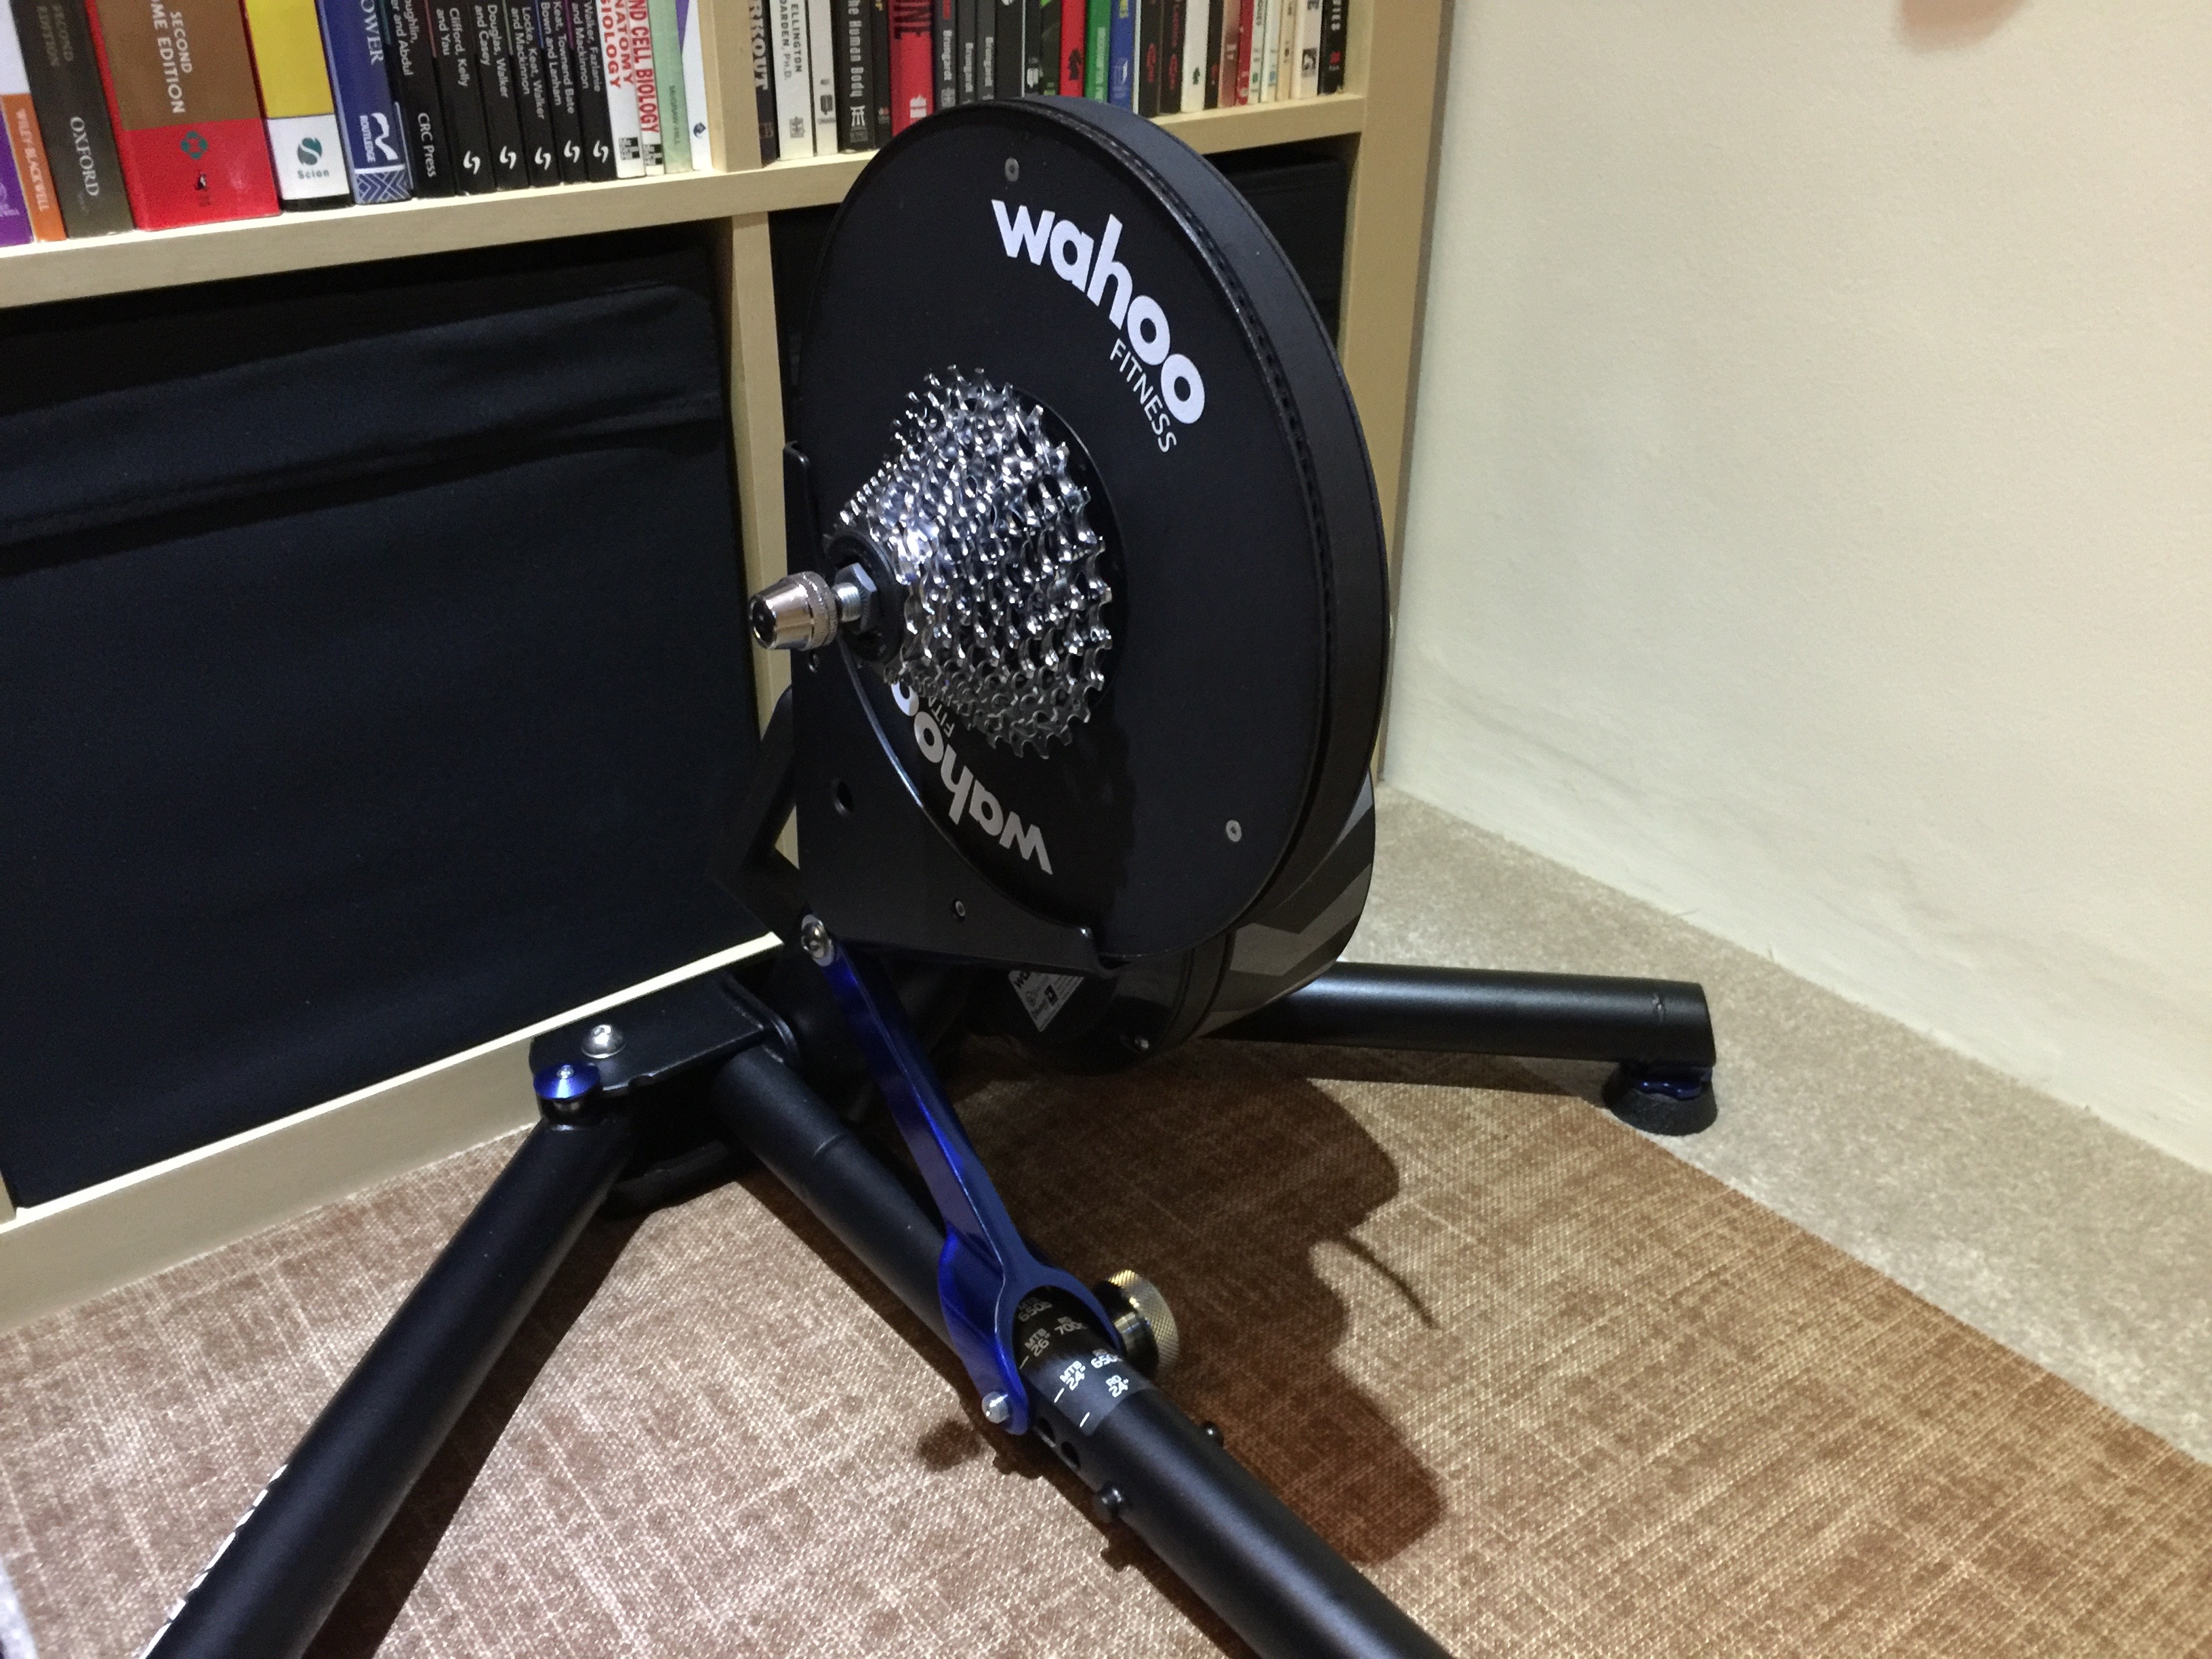


There is no riser block included, as it is apparently not required, due to the off-wheel design (and hence no elevation of the rear wheel). However, a small riser block could be used for stability, and to this effect, I am using a TacX riser, not for the minor raise, but for added support. Unfortunately, a training mat is not included in the box, which is disappointing considering that the KickR is a high-end product. You can pick-up the official KickR training matt online for around £50, which looks nice and will complete your set-up. But there are plenty of cheaper options available.
I downloaded the Wahoo app for iOS, and syncing the two via bluetooth was where my problems started. The iPhone app would find the KickR just fine. But would not connect to it. After a long period of trial and error and troubleshooting, disconnecting from the mains and reconnecting finally solved the issue. I could finally perform a spin-down to correctly calibrate the KickR.


The second hurdle I faced was connecting with Zwift. I won’t bore you with all the details, but I found out the following from my experiences tonight.
-Connecting the Wahoo KickR via Bluetooth and other accessories (cadence/HR, etc) by ANT+ resulted in dropouts.
-Connecting the Wahoo KickR via Bluetooth did NOT provide simulated resistance in Zwift.
-If you use Bluetooth, you “must” keep the iOS app on! If you exit the app, Zwift will stop recognising your KickR, thus ending your ride. Reopening the app did not start-up my ride again!
I should add that Wahoo support was excellent. I emailed them with the connection issue and they within a couple of hours. The point to take away from all this is that I would definitely and only recommend connecting with ANT+.
BUYING DECISION
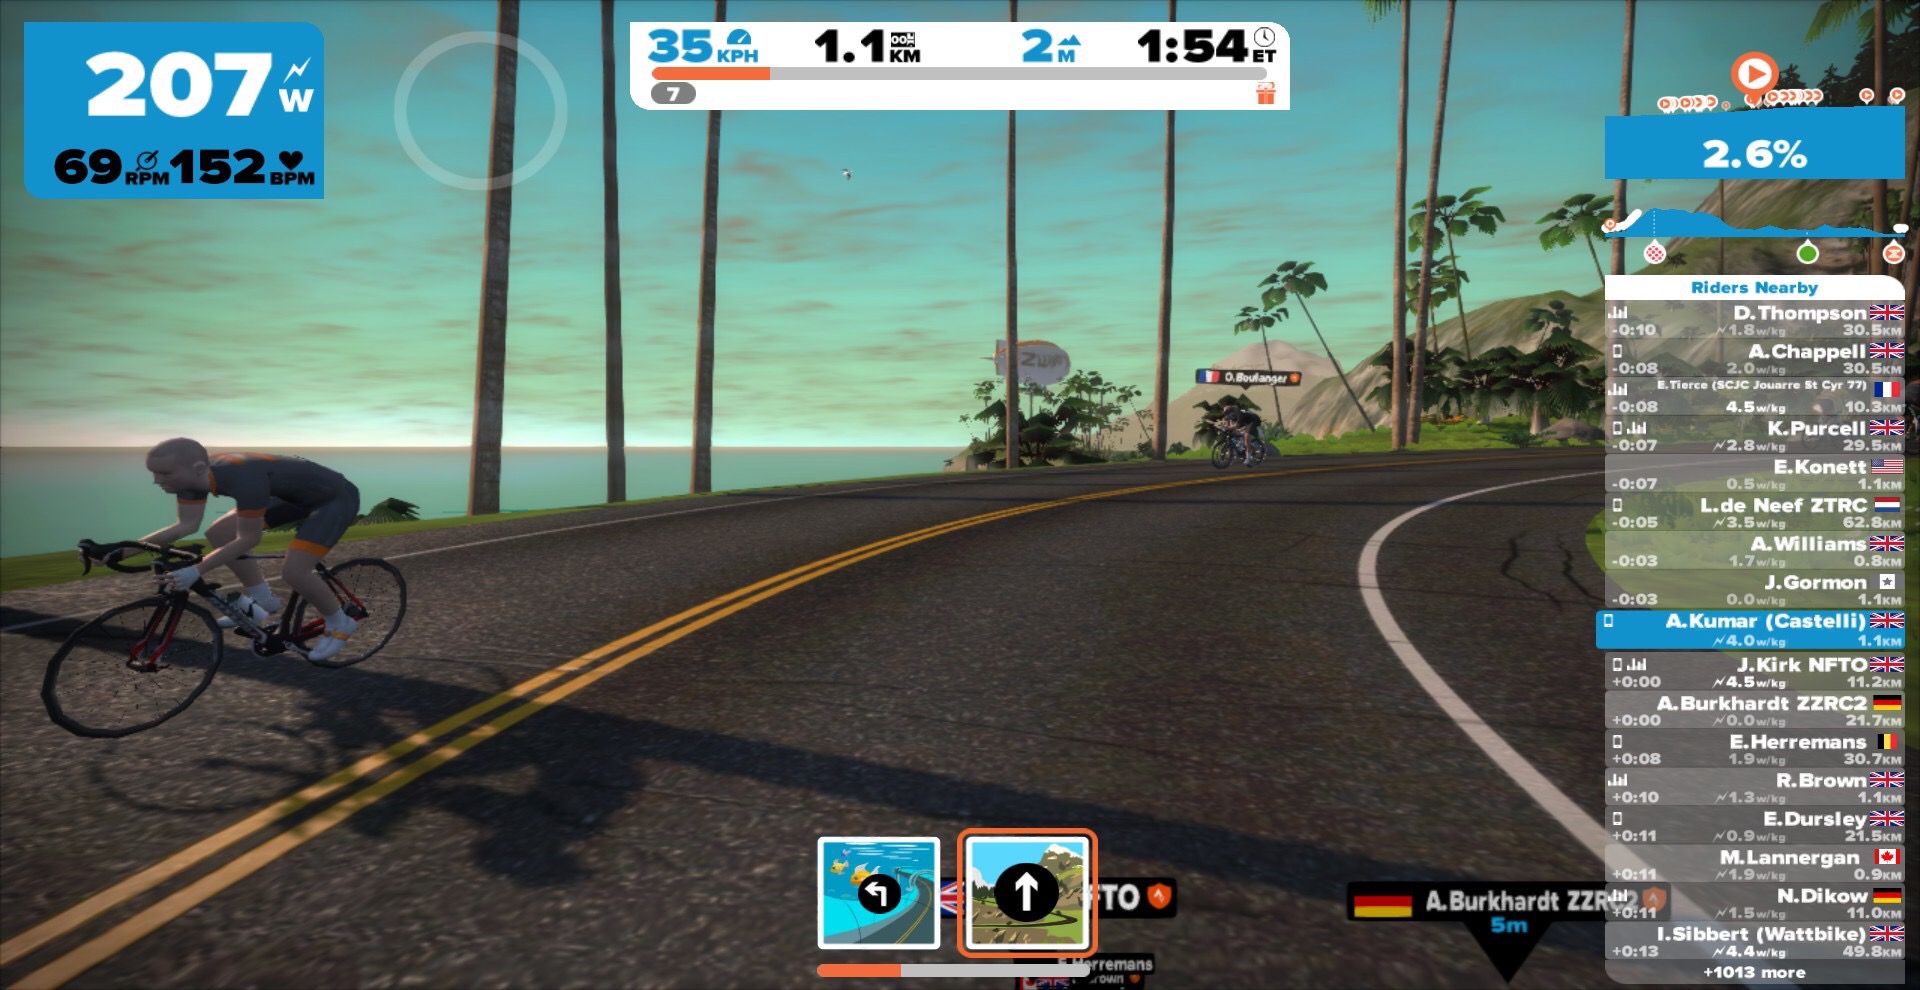
I purchased the CycleOps Jet Fluid Pro in November 2015 (less than 2 months ago) as a way to get some extra cycling miles in during the winter months or when the weather is bad. I did not know about Zwift at the time; an absolutely fantastic cycling software that let’s you cycle in an online world with other riders. It is highly addictive (in a healthy way!) and has really transformed my indoor cycling sessions, almost to the point where I sometimes prefer to cycle in Zwift as opposed to on the road. The vast majority of turbo trainers can be used with Zwift, as long as they have a speed sensor. However, only a smart trainer can provide virtual resistance. A more detailed explanation of how Zwift works can be found in a previous blog post I created here > https://andykumar.net/2015/12/21/zwift-review-online-interactive-turbo-training/
So now I was in possession of what Zwift classes as a ‘dumb’ turbo trainer. The maps on Zwift feature inclines, descents, flats, etc. The biggest problem I had with this was that as I was cycling through the Zwift world, resistance from my turbo would remain constant. So going up an incline would mean that my speed on screen would decrease, but resistance would remain constant from my turbo, making the overall cycling experience feel somewhat unnatural. Based on this, I would also struggle to find the correct gear to mimic the incline/descent. I’d find myself either spinning over 100rpm with very low watts on an incline, or grinding away in a high gear of a descent. A smart turbo trainer can overcome this by providing the appropriate resistance on the virtual hill gradients.
Zwift themselves recommend the KickR as the best trainer to use for an optimal set-up, and it is generally considered to be (one of) the best turbo available today. It is also used by the Team Sky as part of their training, so must be worthy of the hype. I originally contemplated getting this back in November, but was unaware of Zwift at the time, and had no idea that I would be spending any significant amount of time on indoor cycling.
The biggest plus points for me are as follows:
-More realistic road-feel.
-More accurate power measurements.
-Controlled resistance in Zwift.
I will briefly explore each of these below.
ROAD FEEL
Coming from a relatively cheaper turbo trainer (fluid-based), I could really appreciate the direct mount feel of the KickR. I am going to mention this from the start. It is NOT like riding out on the road. In all honesty, there is probably no substitute for that. However, the feel is very genuine and ALMOST as good as a road feel. The KickR comes fitted with an 11-speed cassette (11-25t), so was immediately compatible. I would have preferred a cassette with 32t, but this is no big deal. The KickR is not much quieter than the fluid trainer I was using before, and emits a different noise, more akin to a whirring spin. I actually quite enjoy this (I will update with a video shortly). Also, if I were to briefly stop peddling, for example when going downhill (coasting), there is a continuous spin from the trainer, just like you would expect from your bike hub on the road. This adds to the road feel, and was lacking with the wheel-on turbo.
POWER
The KickR features a fully built-in power meter that Wahoo claim is accurate to +/- 3%. So far I have been using Strava/Zwift’s virtual estimates, so it will be interesting to see how these values change now that I will be using a ‘proper’ power meter. With reference to the power measurements from the KickR, the best information to provide would be the following statement direct from the Wahoo website, “lab accurate power measurement at the hub that is consistent and calibrated throughout every gruelling mile. Accurate to +/- 3%”.
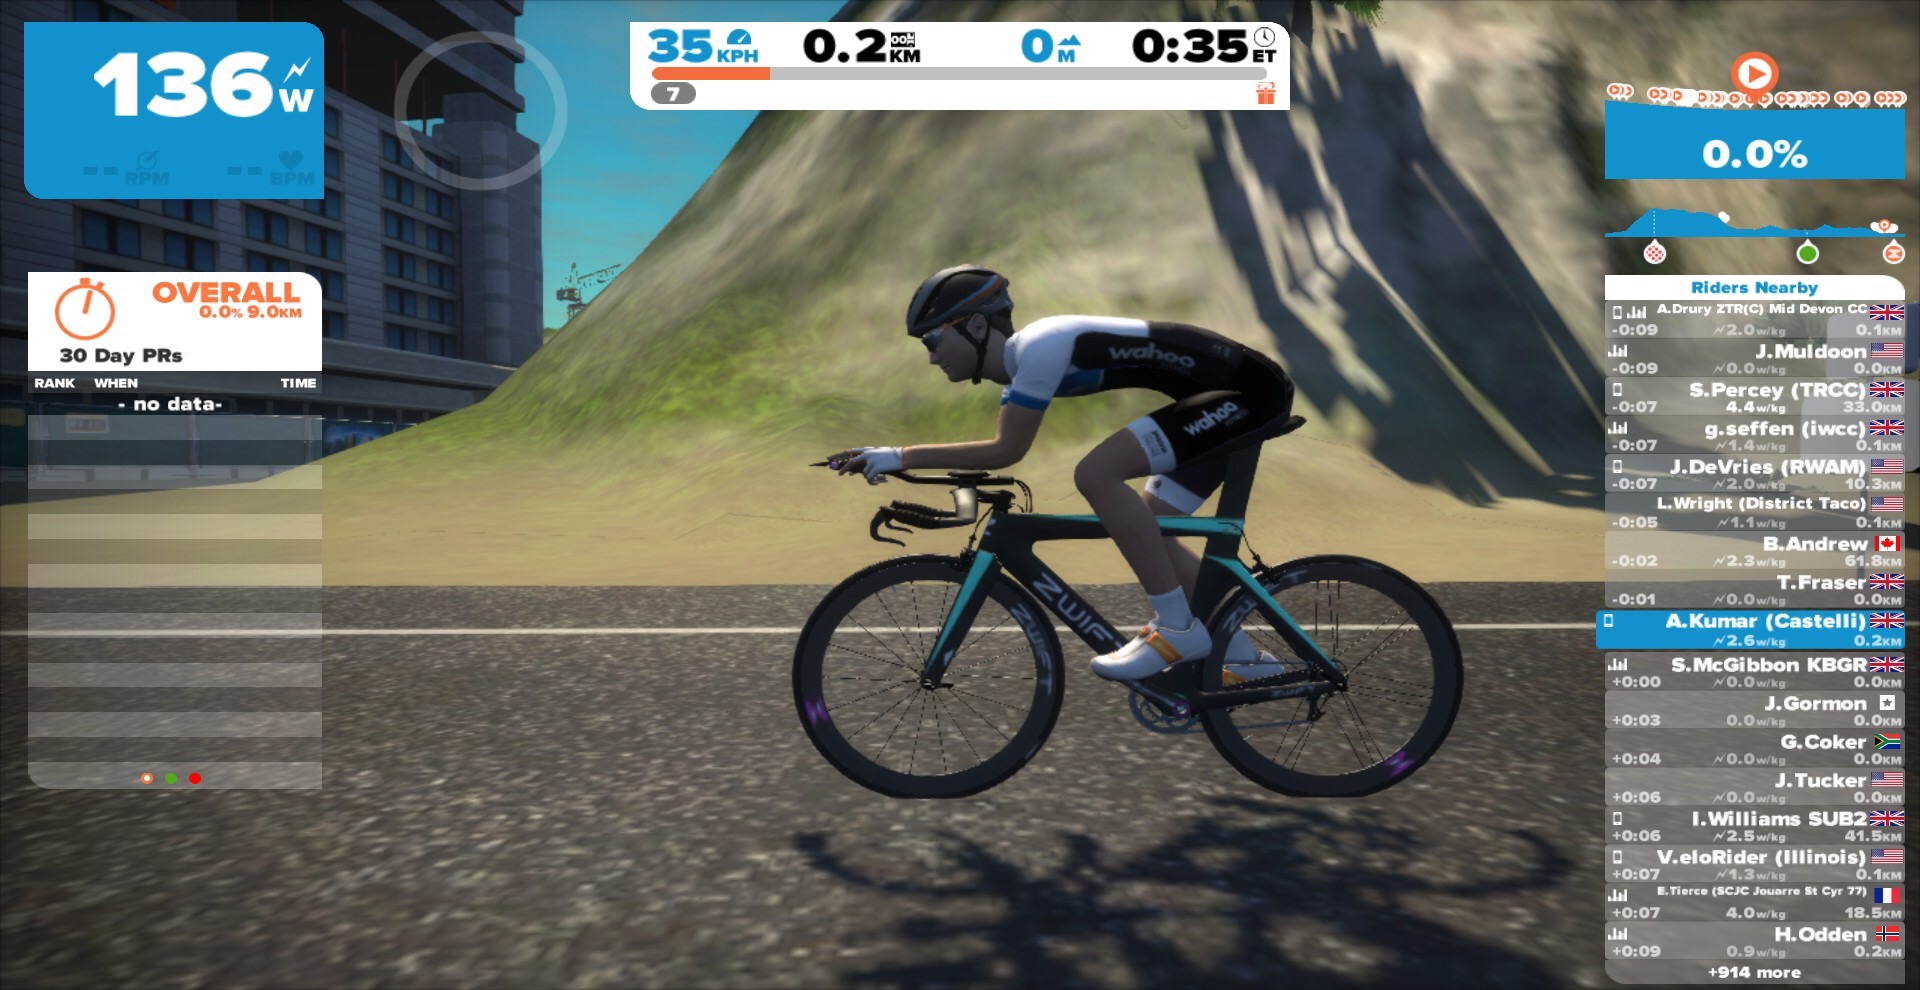
When riding in Zwift I now have a lightning bolt icon next to my power output on the screen, something I did not have with the CycleOps trainer. The lightning bolt only appears for users who are using a power meter, either through a smart trainer, or from a power meter crank arm.
After everything was set-up, I did a quick 10km ride at a relaxed pace. To my (pleasant) surprise, my power readings were much higher higher than the estimated values I got before. Hitting 200w took significantly less effort. My cadence was also more realistic (comparable to my road rides), as my cadence was around mid-60s with the fluid trainer.
The benefit of viewing power readings feels to be somewhat of a necessity now, and not having these readings whilst out on the road is a little disconcerting. Unfortunately, power meters are still very costly (thing upwards of £500) and a luxury that not many cyclists can afford. Hopefully the price of these become more digestible in the years to come. Until then, I guess my outdoor rides will still have to be largely based on Strava estimates, which to be honest, are not too inaccurate. Unfortunately, these estimates cannot take into consideration the effects of external factors like wind and drafting, but this is no big deal for the time being. At some point I would like to get a power meter for the road, too, and further compare results and keep wattage consistent between indoor and outdoor cycling.
CONTROLLED RESISTANCE
This was arguably the biggest reason for changing my turbo trainer. As I briefly mentioned above, riding without controlled resistance in Zwift was proving to be a little frustrating. After all those issues I mentioned above and some trial and error rises, I was now finally feeling the inclines as I climbed them, with resistance being increased. This felt incredible compared to a normal turbo trainer, and forced me to shift down into a lower gear to keep my speed and cadence up as a I battled the climb. After the ascent, I would notice the resistance becoming normal, before going downhill and feeling the resistance again become much easier, meaning I could shift into a higher gear and really throttle downhill.
OTHER THOUGHTS
A few other things I really liked about using the KickR with Zwift. Starting Zwift with the KickR unlocked the Wahoo KickR in-game jersey! Note, this only unlocked after I connected with ANT+ and not Bluetooth. I also got the KickR from Wiggle, and they did not fail to provide a packet of hairbos (a packet of sweets) actually inside the KickR box! Regular Wiggle customers will know about this. I can only assume that they must have some sort of contract with Wahoo or they open the KickR boxes in their warehouse and physically put them in. A nice treat, regardless.


CONCLUSIONS
Getting a smart trainer has made my entire Zwift experience far more realistic and enjoyable. I am pleased to report that the KickR has met my expectations (after the disappointing set-up process). Getting a smart trainer is more expensive, especially when there are so many high quality trainers on the market. However, if you spent any significant time on the turbo, or if you really like to gauge your performance and progress, it is definitely worth paying that extra cash for a KickR. Hopefully this post will come in handy for anyone considering their first trainer or considering the Wahoo KickR to use with Zwift. All-in-all, I am now doubly excited about my Zwift training, and have recently begun to engage in interval sessions in an attempt to increase my FTP. I am also planning a 100km ride with Zwift (eventually working toward a 100-mile ride) and will be posting more on that soon. I will also be doing a blog post and video on my indoor set-up, so stay tuned for that, too. Until then, Ride On! 🙂

Pingback: Zwift set-up tour | Running | Cycling | Reviews | Gadgets
Pingback: Cycling: one year on! | Andy Kumar Fitness